You can easily translate the web content to your language with the Google Chrome.
Do szybkiego tlumaczenia na Twoj jezyk, polecam uzywanie przegladarki Google Chrome.

Monday, November 26, 2012

Popsicle Stick Sliding Puppet Theater

Since my daughter has been interested in puppets we've signed her for a puppet theater class. In addition to that we've been experimenting different type of puppets and stages.
Today I would like to share my idea for a little bit different, but easy to make
A Popsicle Stick Sliding Puppet Theater.
Prior to the project my daughter chose a story she wished to make –
“Hansel and Gretel” after Hans Christian Andersen.
I read it to her; we discussed the details and went for an action.
By Basia 2012
By Basia 2012
I’m always a big fan of recycling staff, therefore this time we used a soap box.
By Basia 2012
We cut three parallel lines on the top of the box to slide the puppet sticks.
By Basia 2012
She made three sliding scenes as a background.
By Basia 2012
She drew main characters on the popsicle sticks.
By Basia 2012
Then it was time to assemble the pieces together and put on a show.
By Basia 2012
By Basia 2012
After few performances my daughter added some decorations to the front of the box to make it more interesting and dimensional.
By Basia 2012
By Basia 2012
For more fun watch a stick puppet show about Johannes Gutenberg's printing press invention from 1440:

You can find more facts about a German inventor Johannes Gutenberg by clicking on a link below. http://www.ideafinder.com/history/inventors/gutenberg.htm

Thursday, November 22, 2012

"Jolly Learning" Reading and Writing Method


My daughter’s kindergarten teacher is training them in phonics, reading and writing the way which looks very similar to Jolly Learning technique. Jolly Learning utilizes the synthetic phonics method of teaching the letter sounds in a way that is enjoyable and multi-sensory.

Printable “What is Jolly Phonics?”


A little bit of the history of Jolly Learning. It is an independent British publisher founded in 1987 and owned by Christopher Jolly. http://jollylearning.co.uk/
There are four main educators and authors of the books, resources, songs or music:
  • David Vinden - an educated musician and experienced practitioners of the Kodály Approach.   http://en.wikipedia.org/wiki/Kod%C3%A1ly_Method
  • Cyrilla Rowsell - an educator and experienced practitioners of the Kodály Approach. 
  • Sara Wernham - a primary/elementary school teacher, who developed Jolly Phonics with Sue Lloyd.
  • Sue Lloyd - an experienced educator and author of many phonics books and resources in the Jolly Phonics program.  
 
To get a sense of the method watch and listen to a song:

“Jolly Phonics Songs” 

(songs with the letters and sounds in order they learn)

Printable phonic actions


More to watch and listen:
“Jolly Songs A-Z” (from the big book Jolly Song in alphabetical order)
“Jolly Phonics Songs” with picture signs
“Jolly Songs Vowels”
“Jolly Phonics Phase Three”

You can get more instruction by watching:
Printable “Steps for Teaching Reading and Writing with Jolly Phonic”
Printable “Jolly Phonics – Pupil/Student Checklist”
Printable “Word Bank”
Printable “Jolly Grammar”

Wednesday, November 21, 2012

Thanksgiving Pie and Other Ideas

Baking
The recipe is for 2 (two) 8-or 9-inch pie pan.
Pie Crust:
2 Cups of All-Purpose Flour
1 Cup of Confectioners Sugar
1 Yolk
2 teaspoons of Sour Cream
3 teaspoons of Baking Powder
4 oz of Soft Shortening/Butter
Filling:
16 to 20 oz chunky apple sauce for 1 (one) 8-or 9-inch pie pan + 8 crumbed baby biscuits
16 to 20 oz pumpkin pie mix for 1 (one) 8-or 9-inch pie pan
16 to 20 oz whole berry cranberry sauce for 1 (one) 8-or 9-inch pie pan
Sift together flour, sugar and baking powder. Cut in shortening. Add yolk and sour cream. Mix it all to make stiff dough. Divide dough into two equal portions to get 4 portions for 8-or 9-inch pie pan (2 portions for the bases and 2 for the tops.) Roll one portion on lightly floured surface into circle 1/8 -inch thick. Fit onto 8-9-inch pie pen. Now it’s time to preheat oven to 425 F (hot.) Add filling. (Attention! Chunky apple sauce mix with 8 crumbed baby biscuits. Whole-berry cranberry sauce and pumpkin pie mix are ready to use.) From the second ¼ portion make straps and place them on the filling to decorate it. Repeat the process for the second pie pan. Bake in reheated to 425 F oven for 20 minutes, lower the temperature to 375 F and bake 25 minutes longer or until gold. Let the pies cool on a rack for at least 1 hour before serving. You can sprinkle your pie with confectioners sugar.
Thanksgiving List
While waiting for the pies to cool down it’s a great time to make a Thanksgiving List, e.g.
I’m Thankful For:
You can also use the template. Click for the printable version http://www.dltk-holidays.com/t.asp?b=m&t=http://www.dltk-holidays.com/thanksgiving/images/b-givethanks-turkey.gif
You can play a Thanksgiving Alphabet Game. Click for the printable version https://docs.google.com/file/d/0B6QDkuYk8VqSSHhjTXlEcEVKY2M/edit?pli=1      

Thanksgiving Cards
First idea:
You need a piece of white paper, child’s hand to trace the fingers to make a turkey tail, markers, crayons or paints to color.
When finished place the wishes on the back of the turkey.
This isn't just a turkey as you can plainly see.
I made it with my hands which are a part of me.
It comes with lots of love especially to say,
I hope you have a very, Happy Thanksgiving Day!
Second idea:
Cat the template, glue and color with markers crayons or paints.
http://therapyfunzone.com/blog/wp-content/uploads/2010/11/cutting-turkey-white.pdf  
http://spoonful.com/sites/default/files/0606_thanksgiving_turkey_template.pdf
When finished place the wishes on the back of the turkey.
Joy, Happiness, Health
And many more
Are my wishes for you.
Happy Thanksgiving!
That’s a thank you card my daughter made early this morning.
That’s a thank you lunch she prepered for daddy.
Thanksgiving Book

  
You can also make a simple Thanksgiving book, ask wh- questions and practice reading.
http://www.dltk-teach.com/minibooks/thanksgiving/index.htm
Roll down for the printable version.
 

Thursday, November 15, 2012

Backward - Mirror Writing in Young Children

My five-year-old daughter usually starts writing on the right side of the paper rather that the left, often mixes b with d, p with q, and g, confuses 6 with 9, 2 with 5, makes s, z, lr, 2, 5, 3, 7, etc. backwards or even writes in a mirror image: going from right to left with all the letters or numbers reversed.
I'm aware of the fact that it is still early to be concern about dyslexia, since the scientists believe that the brain does not completely form the concept of left and right until somewhere between ages five and eight.  On the other hand the dyslexia experts advise to intervene as early as in a pre-school to check if a child has tendency toward dyslexia to support him in his needs. To young children writing letters it is a lot like drawing them. When they sketch or paint a fish, it doesn’t matter if it’s facing left or right.  Fish is still a fish.
It matters, however when it comes to letters. It can take some time for this concept to be absorbed. In most cases, a child figures out independently that words in English are printed from left to right, and it does matter which way the letter s faces. By first grade, teachers start asking children to correct their reversals, and by the end of second grade almost all children stop doing it completely. If your child is still finding this a struggle as she/he gets older, and you see some of the other concerns, it is time to consider additional help. Even at that early level of learning there is a way to support your child. Fun activities might help with reading and writing in general.
Few ideas:
  1. While you read to your child trace direction of a reading text with your finger.
  2. Encourage your child to practice writing. Your child should be free to perform and make multiple mistakes without modifications or limitations.
  3. Do not correct your child. If the child is aware enough and asks you if it’s correct, you point out the errors, but not to make a big deal of it. The more the child writes, the easier it becomes. Don't border your child's creativity by constantly pointing out what is wrong.
  4. Place a sticker at the top left corner of the page to remind where to start writing.
  5. If it is a particular letter that is difficult for your child, help with a prompt, such as: b like a big belly sticking out in front of you.
  6. Encourage your child to trace words you've printed, or use inexpensive templates to give practice in printing the letters correctly.
  7. Make fun cards, posters or invitations with these traced letters.
  8. Build a pattern with blocks and have your child copy it.
  9. Make asymmetrical designs that help the child to focus on matching the different sides.
“…Early in life, virtually all children make mirror errors in reading and writing. Indeed, the ability to generalize across symmetrical views, which facilitates view-invariant object recognition, is one of the essential competences of the visual system. When children learn to read, they must “unlearn” mirror generalization in order to process “b” and “d” as distinct letters. In some children, this unlearning process, which goes against the spontaneous abilities inherited from evolution, seems to present a specific source of impairment…” To learn more read chapter 7 of Readingin the Brain: The Science and Evolution of a Human Invention by Stanislaus Dehaene. You can also see overview and color figures from the book by clicking here.
Check my other posts for signs of dyslexia, intervention and tips

Tuesday, November 13, 2012

Marionette Puppet Theater

Puppetworks
Yesterday, on Veterans’ Day we went to a puppet theater. Not any puppet theater, but to a professional, extraordinary marionette theater called Puppetworks, founded and directed by Nicolas "Nicolo" Coppola.  
Puppetworks it’s a small but unique place, hidden in a historic part of Park Slope in Brooklyn, where the traditionally carved marionettes are dangling from the ceiling giving a warm welcome to the visitors.
“Hansel and Gretel”, the 1853 Brothers Grimm story has captured the imagination of audiences for generations. In Nicolas Coppol’s adaptation and with exquisitely crafted by him marionettes, Kevin Frisch’s scrolling scenery, the beautiful songs from the opera by Engelbert Humperdinck, “Ride of the Valkyrie” by Richard Wagner, the classic tale brings the most famous of the Grimm Brother’s stories to life. The master puppeteers, Hansel and Gretel, Suzie their pet duck, the parents, the Forest Animals, Scherzo, the forest bird, Sandor, the Sadmen, the Angels of Goodness and the Lady Rosina Sweet-Tooth - a witch are sure to delight audiences of all ages!
The pre-show introduction helped children to understand the idea and become involved in a 50 minute, unique storytelling experience. The kids were entirely entertained throughout the entire show. They were laughing, sighing or fidgeting from the excitement. The story was full of beautiful expressions and the scenes were nicely premeditated. My 5 years old daughter was enthralled with the performance! So do I. It was a great show, absolutely worth the trip and money. An ordinary day turned into a magical journey to an extraordinary theater. The show was absolutely fascinating and the occurrence unforgettable!

Penny Jones and Co. Puppets
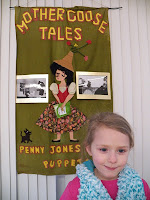
For the Puppet show lovers I would also strongly recommend Penny Jones and Co. Puppets, The Early Childhood Puppet Theater for children aged three to eight, created by Penny Jones in the 1970's and located in the West Village, Manhattan. The theater specializes in informal puppet shows, and puppet ballets with live music.
I took my daughter to see “The Magic Forest.” The performance was smartly designed in three main parts for the young audience to maintain the attention, focus and interest. 
In the introductory part, Ms. Jones herself helped children to understand a plot, learn about the characters and their roles.  During the first break the kids were able to move their hands and legs to the rhythm and get ready for more stories. The nursery rhymes which appeared half way let the children break the silence. 
Along the show the audience was asked several questions which required creative thinking to find the best answers and solutions. In addition the children practiced their language skills. 
The children left the show with the filling of being an active part of the performance. They learned how to make crowd noises, sound effects or a magic mixture to bring spring sooner.  At the end Barbara had a chance to get a backstage tour, touch and maneuver the puppets or asked variety of questions related to the process of making and operating them. The whole experience was exceptional.

David Syrotiak’s National Marionette Theater
If you are willing to travel further it is worthy to go to Brattleboro, Vermont to visit David Syrotiak’s National Marionette Theater, founded by David A. Syrotiak in 1967

Friday, November 9, 2012

Komunikacja po Calkowitej Laryngektomi

Laryngektomia Calkowita to calkowita resekcja/amputacja krtani, której konsekwencją jest brak u chorego głosu dzwiekowego i oddzielenie drogi oddechowej od pokarmowej na stałe. Przed zabiegiem choremu wykonuje się tracheotomię, a następnie przez otwór w tchawicy następuje intubacja. Zabieg polega na odcięciu krtani od góry od nasady języka i gardła oraz od dołu od tchawicy. Podczas laryngektomii całkowitej usuwa się także kość gnykową z przestrzenią przednagłośniową. Pozostawione ściany gardła dolnego po odcięciu krtani zszywa się ze sobą, a do przełyku zakłada się sondę odżywczą w celu wygojenia gardła. Przez około 10-14 dni, przy braku powikłań pacjent otrzymuje półpłynny pokarm droga sondowa. Pozostały kikut tchawicy na stałe zszywa się ze skórą szyi tworząc przetokę zwaną tracheostomią lub tracheostomą.
Tracheostomia – zewnętrzna przetoka tchawicy. Polega na chirurgicznym połączeniu tchawicy ze światłem zewnętrznym, celem ominięcia górnych dróg oddechowych. Tracheostomia polega na wycięciu otworu w II lub III chrząstce tchawicy. Przez tracheostomię wprowadza się do tchawicy rurkę tracheotomijną: metalową, srebrną (typu Luera) lub z tworzywa sztucznego. Rurka umożliwia swobodne oddychanie z pominięciem górnych dróg oddechowych.

Sposoby komunikacji po przeprowadzonym zabiegu:

  1. Komunikacja pisemna – szczegolnie w poczatkowym okresie rehabilitacji.

  1. “Mowa Przelykowa” = Esophagial Speech – jest to rodzaj mowy zastepczej. Pod nieobecność krtani fałdy śluzówki przełyku mogą pełnić funkcję źródła dźwięku. Jest to tzw. pseudogłośnia w przełyku. Głos jest niski i cichy. Ma bardzo mały zakres wysokości. Powoduje to znaczne ograniczenie intonacji i utrudnia w związku z tym przekazywanie emocji. Nie ma natomiast problemu z wyrazistością znaczeniową przekazu. Mowa przelykowa to technika wymagajaca silnych miesni, determinacji i czasu. Mówienie jest dla pacjenta męczące ze względu na kolizję z oddychaniem. Uniemożliwia dłuższe ciągłe wypowiedzi. Nauka tego sposobu mówienia trwa długo od 6 do 8 miesiecy intensywnych cwiczen. Wielu pacjentów nie jest w stanie jej dobrze opanować. Wielkim plusem tej metody jest to, ze nie wymaga zadnego typu urzadzen wspomagajacych. Wiecej mozesz przeczytac wchodzac na ponizszy link: http://www.logopedia.net.pl/artykuly/137/laryngektomia.html

  1. “Krtan Elektroniczna” = “Electrolarynx” – Taka krtań zbudowana jest z urządzenia wytwarzającego impulsy, cewki oraz kawałka metalu uderzającego w specyficzną przegrodę zwaną membraną. Sztucznie wytwarzane drgania wprowadzane sa do jamy ustnej poprzez przyłożenie mechanizmu do szyi.
    • Krtan Elektroniczna starego typu daje syntetyczny glos. Ponoc najlepsza na polskim rynku jest niemiecka krtani firmy Servox lub krtani Amplicord. Poza tym znalezc jeszcze mozna produkty firmy Cyber Biomed, MicroVox, HiVox i EcoVox. Zajrzyj na ich strone: http://www.cyberbiomed.com/produkty/. Slyszalam rowniez o skonstruowanej w Gdansku cyfrowej krtani elaktronicznaj. Wiecjej dowiesz sie wchodzac na ponizszy link: http://www.roik.pl/cyfrowa-krtan-elektroniczna-ulatwia-plynne-wypowiadanie-sie-osobom-po-laryngektomii/
    • Krtan Elektroniczna nowej generacji pozwala na produkcje dzwieku z mozliwoscia intonacji. Znana jest pod nazwa TruTone™ Electrolarynx.  Wajdz na ponizszy link, aby uslyszec roznice: 

  1. “Przetoka tchawiczo-przełykowa” = Tracheoesophageal Puncture and Prosthesis – zabieg polaczenia tchawicy (droga do pluc) z przelykiem (droga do zoladka) poprzez proteze (plastikowa rurka z filtrem). W celu wyprodukowania dzwieku nalezy palcem zakrywac otwor w szyi = stoma, taka by powietrze skierowac do narzadow mowy, w tym przypadku jamy ustnej, jezyka i ust. Wejdz na link, aby zobaczyc protezy http://www.webwhispers.org/library/TEPProsthesis.asp     
  2. Dla ulatwienia i uwolnienia dloni mozna uzywac wygodny filter zwanym Bloom Singer Hand Free Valve. Wejdz na linki, aby zobaczyc produkt i dowiedziec sie czegos wiecej:  http://store.inhealth.com/product_p/be8025h.htm  http://www.webwhispers.org/library/hands-freedevices.asp