You can easily translate the web content to your language with the Google Chrome.
Do szybkiego tlumaczenia na Twoj jezyk, polecam uzywanie przegladarki Google Chrome.
Showing posts with label oral-motor. Show all posts

Wednesday, May 27, 2020

“The best practice for swallowing is swallowing” – Dysphagia in Children and Adults

Basia

Swallowing Evaluation and Rehabilitation

Check my other post:
Dysphagia - Feeding & Swallowing Disorders in Infants & Children
Dysphagia and Swallowing Therapy and Treatment, Diet and Liquid Consistency

 
Basia

I refreshed my knowledge about Dysphagia by viewing ASHA webinars:
“Elements of a Comprehensive Clinical Dysphagia Evaluation presented” by Joseph Murray, PhD, CCC-SLP
“Impact of Impaired Antomy and Physiology on Treatment of Dysphagia in Adults” presented by Nancy B. Swigeret, MA CCC-SLP, BCS-S
“Dysphagia Intervention: Planning and Implementation” presented by Nancy B. Swigeret, MA CCC-SLP, BCS-S
“Theoretical Basis of Exercise and Treatment of Dysphagia” Nancy B. Swigeret, MA CCC-SLP, BCS-S
 
Basia
What is normal swallowing?
Normal swallowing consists of a set of physiologic behaviors which result in food, liquid or other substances moving from the mouth to the pharynx and esophagus while protecting and closing the airway to the stomach. Swallowing is an important part of eating and drinking.
What is swallowing dysfunction?
When the process fails and the bolus is aspirated, this is called swallowing dysfunction or dysphagia. Dysphagic patients may have difficulty with any one or more of the anatomic or physiologic components of the oral, pharyngeal or esophageal stages of the swallow.

Basia
What is a role of swallowing evaluation?
Evaluation of the patient with dysphagia should identify the anatomic or physiologic abnormalities characterizing the patient's swallow and include introduction and assessment of the efficacy of treatment strategies.

Basia

What is the primary goal in the management of swallowing disorders?
The primary goal in the management of swallowing disorders is to ensure safe swallowing. For determination of the appropriate rehabilitative approaches, clinicians should consider the assessment of all symptoms and problems causing dysphagia.


What are tree types of management?
The management of swallowing disorders:
  • medical management
  • surgical approaches
  • rehabilitative approaches.

What are the types of treatment?
Treatment may involve:

  • compensatory management, such as postural changes or enhancing sensory input
  • rehabilitative management, such as active muscle exercise with or without the introduction of food.

Friday, November 22, 2013

Decrease Tongue Protrusion and Improve Oral-motor Strength

Tongue protrusion is very closely associated with Down Syndrome and is regularly cited as a feature of the condition. It has been traditionally stated that this is due to the presence of an enlarged tongue, however current thinking favors a combination of physical and developmental factors, specific to each individual.
Tongue movement should be considered within the context of the whole body. All parts of the body are connected and factors affecting normal motor development in one area may also influence the mouth. In order to develop movement and skills, we must have a stable trunk. Without that stability, our function is affected. Think of a young baby – their body movements are uncontrolled and random, but become more organized as they learn to control various parts of the body. Once trunk stability is established, body parts such as arms, legs, head, etc. can develop more refined movement. For example, before a child can reach and grasp a toy, they must develop control over the shoulder and trunk.
Similarly, oral stability depends on neck and shoulder stability, which is dependent on trunk and pelvis stability. A stable jaw is necessary for the development of controlled tongue and lip movements and as the range of tongue movement develops, children develop a sense of their tongue’s natural resting-place in the mouth (e.g. in the middle).
It is important to remember that not every child with Down Syndrome protrudes their tongue but also, that it is a normal part of early development. It may become exaggerated or persist due to one or many of the following factors:

  • Children with Down Syndrome have a weak suckle as infants and learn to control the flow of liquid by protruding their tongue.
  • Individuals with Down Syndrome have a smaller, higher arched hard palate which means that the tongue is contained in a smaller than average space.
  • There is lower than average tone in the muscles of the tongue. This makes it appear larger because it is floppier. Tongue movement depends on the actions of a variety of muscles in the mouth and it plays a role in swallowing, breathing, chewing and speaking. Individuals with Down Syndrome have difficulty with producing and co-coordinating the necessary movements to control the tongue.
  • During normal development, the tongue grows at a different rate to other parts of the face such as the jaw, which in the early years, normally results in the tongue a high, forward position in the mouth. This, combined with a smaller oral space and low tone in the tongue, may result in the tongue protruding.
  • The muscles of the tongue constantly correct and readjust the tongue’s position in the mouth, based on the sensory feedback it receives. Many children with Down Syndrome have difficulty receiving and integrating sensory information and may not develop these skills as quickly or completely. Consequently, they may not be aware that their tongue is protruding.
  • Tongue protrusion may also result from an inability to move the jaw separately from the tongue. This is a skill that develops over time and is dependent on jaw stability. Without this stability the tongue protrudes as the jaw lowers.
  • Tongue protrusion may develop due to airway compromise such as large adenoids or tonsils, which are common in individuals with Down Syndrome.
  • The ability to self-correct a protruding tongue requires some degree of insight and motivation to change. Depending on a child’s age and developmental level, this self-monitoring may not develop fully, or may develop much later.
  • Many children with Down Syndrome have delayed motor development and therefore may not have the stable base from which oral-motor skills can develop.
  • Upper respiratory tract infections, which block the child’s nose, may cause them to breathe through their mouth rather than their nose. In mouth-breathing the jaw lowers and the tongue is no longer contained within the mouth. These infections may develop as a result of middle ear infections, which are common to individuals with Down Syndrome. This develops due to a dysfunction of the Eustachian tube, which is located at the back of the throat and is connected to the middle ear (its function is to equalize air pressure on both sides of the eardrum). If there is low tone in the muscles surrounding the entrance to the tube, fast-flowing fluid may enter the middle ear, causing an infection over time. 
In my own experience of working with children with Down Syndrome, tongue protrusion has generally been a transient phase, often associated with periods of teething or throat infections. Cases that have persisted have been a reflection of a more significantly reduced overall body tone and consequently, more significantly delayed oral-motor development. These children have also demonstrated more delayed eating and drinking skills, which is reflected in reluctance to transition from smooth to lumpy foods and delayed biting and chewing skills. Biting and chewing relies on graded jaw movements and the ability to move the tongue in a variety of directions. In encouraging a child to experience biting and chewing safely, both areas can be developed at the child’s own pace.


From an oral-motor viewpoint, there are a number of areas that can be focused on. While the primary focus is on improving oral-motor skills, there will be a knock-on effect in relation to feeding and speech development. Be aware of your child’s level of development and consult with your speech & language therapist, physiotherapist and occupational therapist, to ensure you select an appropriate starting point. To minimize tongue protrusion, your child needs to develop some or all of the following:
  • Stable, central base (i.e. control over the trunk, head, etc.)
  • Increased oral/facial muscle tone
  • Increased oral sensitivity
  • Improved lip movements
  • Improved jaw movements
  • Improved tongue movements. 
As you can see, tongue protrusion may occur for a number of reasons. Many children with Down Syndrome may simply be exhibiting a generalized delay in their development, of which tongue protrusion is one feature. It is important therefore, that a full assessment is carried out, to ensure that the correct remediation path is chosen. It would be inappropriate to focus on skills that the child is unable to achieve. In normal development, these oral motor patterns are generally established by the age of 24 months, but your child may have a developmental delay and difficulties with low tone, so starting any activities at this age may be inappropriate. Every child presents a different picture; therefore every therapy plan should be tailor-made. It is essential that you consult with a speech and language therapist, occupational therapist and physiotherapist to get an overall picture of your child’s physical, sensory and oral-motor development and discuss the value of working on this area. These are the professionals qualified to guide you through the process.
Without the possibility of meeting therapists, you could try some of the suggestions below. Eliminate any medical reasons (e.g. enlarged adenoids/tonsils, teething, throat/respiratory infections, etc.). Select one or two exercises to try, but be aware that doing them all at the same time could be harmful. Adults can often become overenthusiastic and if the child is unable to co-operate with the exercises, they may become resistant to any form of intervention in the longer term. It is vital therefore that you are aware of your child’s strengths and difficulties and give them lots of praise for any attempt that they make. They may require many opportunities to practice and will need you to demonstrate it clearly, in a way that they will understand. Observe your child and take note of the times their tongue protrudes, what they are doing at the time, how long it persists, if they correct it themselves, etc.
Be patient and be prepared to repeat the activity over and over again. It may take time before the skill is achieved. Most of all - make it fun!

Precautions  
  • Don’t do all the activities at the same time.
  • These activities should not be done at mealtimes as this could lead to aversive behaviors around food.
  • These exercises should be dome for short periods of time.
  • Talk through what you are doing, each step of the way.
  • Ensure you are both positioned in a relaxed, comfortable position.
  • Ensure your child is in a stable, supported position.
  • Minimize distractions e.g. TV, radio, other people etc.
  • Pause to allow time to swallow any saliva that may have accumulated.
  • These exercises can be done throughout the day, washing, drying at bathtime, using a towel, sponge, facecloth, etc).
  • Don’t attempt this if your child has a cold.
  • Stop if your child becomes distressed at any time.
Some oral-motor exercises
  • If your child is sensitive around their face, prepare them before you approach their face. Use slow, firm strokes over the hands, arms, shoulders, body and neck with a rough texture (e.g. towel, etc.)
  • Using firm strokes/touch with a rough texture (e.g. towel, etc.) start at the sides of the face / forehead / chin and gradually work towards the centre of the face.
  • Massage the cheeks using circular movements, particularly around the mouth.
  • Use 2 fingers to press the top and bottom lips firmly together. Hold for a couple of minutes and release.
  • Stroke firmly downwards on the area between the nose and top lip while using your finger to push the bottom lip upwards.
  • Using your thumb and index finger, pull the top lip down, starting under the nose and working towards the top of the lip (without touching the lip itself).
  • Do the same for the bottom lip, working from chin to the lip. Support the jaw if necessary.


  • Press the lips together by pressing one index finger below the nose and the other below the bottom lip - rotate the fingers towards the lips.
  • Gradually introduce stronger flavors at mealtimes:
  1. curry,  Chinese sauces, garlic
  2. chips: vinegar, garlic, mayonnaise dip, brown sauce, ketchup, etc.
  3. tangy or bitter flavor fruits and yoghurts: kiwi, lemon, forest fruits, grapefruit, cranberry, etc.
  • Extremes of temperature:
  1. ice-cream, ice-pops
  2. worm food
  • Sensory toys:
  1. “Bumble Balls”
  2. Teethers that are textured or battery operated for vibrations, etc.
Practical ideas for developing jaw and tongue movements
  • When spoon-feeding your child, place the food centrally on the tongue and apply firm downward pressure. This will reduce tongue protrusion that occurs during swallowing.
  • As the protrusion reduces, place the food at the sides of the mouth, between the teeth. This will encourage munching and sideward tongue movements.
  • To stimulate biting, munching and sideward tongue movements:


  1. Initially, do this at times when your child is relaxed.
  2. Initially, these activities should not be done at mealtimes.
  3. Use items such as tethers (ridged etc.), foods that do not break up, bite and stay firm foods, dried, but not too dry fruits: bananas, peaches, apricots, Liquorices sticks, etc.
  • Place the item in the mouth, between the teeth, along the line of the jaw and ensure that it is not placed so as to stretch the lips. Do not place too far back in case your child gags.
  • Place on the best side initially, than move to the other side.
  • If the child is not munching, pull the item out slightly and gently or press down.
  • When you feel your child is confident about their biting skills, introduce food items. Initially use bite-and-dissolve foods (Boudoir biscuits, meringues, Skips/Snax, etc.)
  • If the child is not biting off the food, break it off for them while they are biting down on it. Do not force your child to take foods that their mouth is not ready to handle.
  • Over time, gradually introduce chewier foods in the same way.
Practical ideas for developing lip movements

  • Using a mirror, make “oo” sounds (e.g. a ghost/owl/ monkey/wind etc.) and “ee” sounds (e.g. mouse, E-I-E-I-O, etc.) using exaggerated lip movements. You might need to gently push the lips from a tight stretched position (smile shape) to the round position (kiss shape).
  • Practice kissing. You might need to gently push the lips from a tight stretched position (smile shape) to the round position (kiss shape). Put on some lip stick or face paint and make kiss marks on a mirror, tissue, paper etc.
  • Sucking through a straw. Make a tight lip seal around the straw.
  • Blowing bubbles, blowing cotton wool balls across the table, blowing whistles/party blowers, blowing bubbles in water with a straw, etc.

Thursday, June 27, 2013

Whistle and Horns as Therapy Tools

History and Function
Horns or whistles have been used for thousands of years for spiritual, practical, and entertainment purposes. Originally they were simple devices that produced sound when air was forced through an opening.
Whistles were mainly made of bone or wood. One of the most distinctive whistles is the boatswain's pipe used aboard naval vessels to issue commands and salute dignitaries. It has evolved from pipes used in ancient Greece and Rome to keep the stroke of galley slaves. A medieval version was used during the Crusades to assemble English crossbow men on deck for an attack. Their loud, attention-getting blast made whistles essential for police officers and sports referees.
The modern era of whistle use began in 1878 when a whistle was first blown by a referee during a sporting event. Hudson, a toolmaker who was fascinated with whistles, fashioned a brass instrument that was used in a match at the Nottingham Forest Soccer Club. This device was found to be superior to the usual referee's signal of waving a handkerchief.
Horns originally were made from animal horns and primarily used as signaling devices. One of the earliest "horn-like" instruments, the lur, dates back to sixth century B.C. Made of bronze. These horns were used on the battlefields by Scandinavian clans.  It makes a loud, obnoxious sound, just perfect for striking terror into the enemy camp. The horn as a musical instrument has only existed for several hundred years.
In Europe, horns gained popularity in the trendy sport of hunting. As this aristocratic sport spread, horn-makers experimented with different shapes and sizes to increase the range of notes possible.  In 1636, French musical scholar Marin Mersenne wrote of four different kinds of horns in his Harmonie Universelle: Le grand cor (the big horn), the cor à plusiers tours, (the horn of several turns), le cor qui n'a qu'un seul tour (the horn which has only one turn), and le huchet (the horn with which one calls from afar). Horns such as the cor de chasse and trompe de chasse (pictured left) fall into this latter category.
In the modern days we use horns and whistles not only forgetting attention, hunting, or entertainment purposes but also as a very effective therapy tool. The speech therapists utilize them to correct articulation disorders, deal with deficits in phonation or breathe control, work with cleft palate repairs, teach velopharyngeal functions and improve speech clarity. Using horns as therapy devices is not only powerful, but most of all fun. When you use horns or whistles you deal with the development of muscles in three areas and in specific order: phonation through the abdominal muscles, resonation through muscles of the velum and articulation via the muscles in the jaw, lips and tongue. Traditional speech therapy without the proper muscle control cannot be completely successful, but it is equally important to remember that oral-motor therapy is an adjunct to traditional therapy, not a replacement. It is critical that clinicians not stop or replace their clients' current therapies in favor of oral-motor therapy, rather that they use it as an additional building block. When the targeted muscles do normalize, the introduction of traditional methods such as auditory feedback, or phonological processing approaches, attain measurably higher degrees of success.
Horn Therapy after Sara Rosenfeld-Johnson
Sara Rosenfeld-Johnson, M.S.,CCC/SLP, an oral-motor guru, has developed a program that includes fourteen progressively more complex horns. I personally attended the training led by the master and since then I’ve been often using the whistles, known also as horns.
Sara Rosenfeld-Johnson designated specific goals such as:
  • correcting an interdental lisp,
  • improving lip-rounding,
  • working on specific phonemes.
She distinguished two broad categories of clients:
    1. Clients with more severe problems, who start at the first horn and work to complete the entire hierarchy. These clients must successively master each horn until they reach horn fourteen, the final horn. This approach is suitable for the clients with Cerebral Palsy or Down Syndrome and could take up to two years.
    2. Clients with less severed problems, whose specific needs can be treated by the use of individual horns that work on their personal speech deficits. This gives the clinician a methodic, scientific way to create an individualized program for each client that often is completed in four to five months. These exercises can be used by clients of all ability and age groups starting as young as eighteen months. In a few instances I have used them with clients as young as twelve months and had success with a client one hundred-four years old!
She put some facts under the following consideration:
  • Clients who present lack of grading in only a jaw, tongue or lip are counted as the least impaired patients.
  • Clients who have deficiencies in velopharyngeal closure must address those defects before the jaw, tongue or lip issues are addressed.
  • Clients with abdominal deficiencies are considered the most severely impaired. In that case the jaw, tongue and lips cannot be addressed until the velum is addressed, and the velum cannot be addressed until the abdominal control for airflow is addressed.
Sara Rosenfeld-Johnson organized the horns by goals and the muscle movement required to produce phonemes. Not to repeat what was already said I will quote her article published on May 31, 1999 in ADVANCE Magazine.
”Each horn incrementally becomes a degree harder when working in the hierarchy, rechallenging the client's achievements in a rewarding way. They are suitable for group therapy environments, like those with school children, and some can be adapted to create interest for visually impaired clients. Horns are also an important part of a drooling program because they address awareness of lips, maintenance of lip closure and teach retraction of saliva back over the tongue, much of which can be taught without cognitive cooperation. With horn therapy even our clients with major deficits make significant therapeutic progress.
At the outset of the program, after diagnosis, the therapist introduces a target horn and determines the highest number of repetitions that can be achieved in rapid succession at one time without a break. The goal with each horn is to achieve twenty-five successive repetitions, taking a small breath between each blow. If the maximum number of repetitions produced is less than the targeted goal of twenty-five the therapist stops there and assigns the attained number as homework to be practiced each day. These exercises should be practiced at least twice a week with the therapist and, ideally, at least once a day at home. As each horn is mastered, the therapist introduces either the next horn in the hierarchy or the next horn appropriate to the client's goals. Parents and caregivers assist the client to practice their homework. As we know, it is vitally important that parents/caregivers be assigned a meaningful role in treatment. Many of our young cognitively impaired patients can barely interact with their parents. Involvement in this homework gives them an easily fulfilled assignment that gives immediate emotional and therapeutic feedback for the child and the parent/caregiver.
Let's briefly review a few specific horns to better understand their interaction in the hierarchy and discuss some of their unique attributes.
  1. The first horn is so easy that it requires almost no abdominal constriction and no constriction of the obicularis oris muscle. It produces sounds almost from the client's vegetative breathing. This horn teaches jaw elevation with minimal lip closure as the client learns to volitionally control airflow. Outside of the hierarchy it improves the production of the sounds /m, b, p /.
  2. The second horn is a harmonica-like device that teaches further lip closure and the skill of projecting exhalation in a frontal manner. By gradually covering up the side holes until only the central holes remain exposed, clients can feel (and hear) the redirecting of airflow to the very front of the lips. Used alone, this instrument works on the standard production of /s / by assisting in the correction of a lateral lisp.
  3. The third implement is similar to a slide whistle. It requires more than elementary lip closure and teaches first level lip rounding for the production of /w, oo, sh, ch, j /.
  4. The fourth horn has a flat mouthpiece and must be blown for a one-two second duration. These variations increase the abdominal and lip closure difficulty, furthers the work on production of /m, b, p / and the prolongation of oral language statements.
  5. The horns five, six and seven address additional prolongation of sound, bilabial sounds, oral-tactile defensiveness and low jaw sounds required for vowels and open-mouth consonants. Horns eight and nine work on bilabial sounds and tongue retraction. Horn nine is also an important tool for clients working on oral-nasal contrasts, especially after cleft palate repair.
  6. Horns ten through fourteen work on intensifying the degree of duration of exhalation, lip-rounding, lip protrusion, tongue retraction/release, abdominal constriction/tension and they specifically target the correction of the interdental lisp.
As we said horns are fun, and fun is a motivator. Part of the success of this therapeutic approach is that this is work, and for many clients, difficult work. The work is disguised as a toy and the fun that they have repetitively using the toy is exercise, the same as doing ten, twenty or thirty sit-ups is exercise. Recreating a muscle movement through the element of repetition is our goal with each horn used. But keep in mind that this is not play therapy, this is work!
Accordingly there are certain rules that must be followed during therapy:
  1. Whether an adult or a child, the client's feet must be firmly on the floor, or other stabilizing surface, and the body should ideally achieve 90° angles in the pelvis, knees and ankles. This does not vary whether your client is in a chair, a wheelchair or you are working with them over therapy balls, bolsters or in a prone-stander. The importance of posture during these exercises cannot be overstated. Stabilization in the body allows for mobility in the mouth. Seating and posture are so imperative that I encourage you to consult with a physical or occupational therapist to achieve optimal or maximal positioning. This postural work has been traditionally in their realm, but for the purposes of these exercises it is now ours, too. During all of your therapy sessions with the client, and during homework, it is important to maintain this maximal posture.
  2. The therapist holds the horn and makes sure that there is no biting, because if these horns are used incorrectly they will become toys and rendered ineffective for therapy. If a therapist were to simply hand a child the horn their first reaction would be to put it into their mouth and bite on it. Biting eliminates the therapeutic jaw-lip-tongue dissociation component of horn therapy. Beginning with the ninth horn clients who are cognitively involved with the therapy and who show that they are capable of following directions can be allowed to hold the horns by themselves while the therapist continues to monitor posture and placement. For older children and adults, therapists should use their discretion based on diagnosis and cognitive ability.
  3. Remove the horn from their mouth after each blow. This therapy requires repetition. We are recreating muscle movement over and over again to develop strength/muscle memory. The goal with each horn is to be able to blow, with controlled exhalation, twenty-five successive repetitions and for the jaw, lips and tongue to successfully reposition prior to each blow.
The client populations who benefit from these techniques are truly diverse. For example, clients who have the diagnosis of apraxia/dyspraxia can use horn therapy to learn motor-planning movements for the eventual development of speech clarity. These methods sidestep their deficiencies. The stimulus-response technique of the horn creates the muscle action allowing the muscle to take that movement into memory. A clinician can put their hand on a client's stomach and push inward during an exhalation getting the air to go through the horn and produce sound. This gives the client a new awareness of the fact that something that happens in their abdomen creates sound from their mouth. Cognitively impaired clients gain this same awareness devoid of verbal instruction.
Many clients of various diagnosis have insufficient ability to contract and grade their abdominal muscles and must learn to tighten them in order to control their exhalation. Low tone in their abdominal muscles produces insufficient amounts of air that only support single words or short phrases. Horn therapy assists to accomplish this without using compensatory skeletal movements such as shoulder elevation and/or whole body tightening. These are just two kinds of clients whose problems have not been adequately addressed by traditional speech therapy. The result has been a significant inhibition of the client's ability to express themselves at their cognitive level. At the completion of the horn therapy program, whether using the complete hierarchy or a therapist prescribed progression of specific horns, we have clients with the adequate strength and mobility to start traditional articulation therapies, including auditory feedback and the phonological approach - and they got to make a little music along the way.”

Resources:
Talk Tools, company founded by Sarah Rosenfeld Johnson http://www.talktools.com/


Thursday, February 28, 2013

Straws Therapy

 
The easiest way to improve overall oral-motor function for speech purposes is simply to exercise the muscles while eating.  A very useful tool would be a straw. The use of straw in speech therapy is commonly known. For years straws have been an important utensil in feeding and lip rounding exercises. In the clients' opinion  the straws are fun and the food is a reward. The primary goal of straw is to concentrate on insufficient tongue retraction. These exercises encourage increased speech clarity whether the person has an inter-dental lisp or other varieties of phoneme distortions. Therapeutic straws have also been found to be useful when working with velo-pharyngeal insufficiency or patients that are recovering from a cerebral vascular accident (CVA). In these instances and numerous others, specially gradated straws are used in a hierarchical succession to work on a specific component of oral movement.
Internationally well known an American Speech Language Pathologist - Sara Rosenfeld-Johnson, M.S.,CCC/SLP has created a line of straws along with the related step-by-step exercises. She said that when she was initially using straws for feeding or lip-rounding goals, she was struck by the improved tongue retraction and as the result speech clarity. Since then straws have become one of my most important therapy tools for her. Further she says: “Traditional therapy methods start with the assumption of adequate tongue muscle function. The premise of traditional therapy would follow that if you listen to me when I say "ball" (auditory stimuli), and you look at a ball when I say it (visual stimuli), and if you hold the ball (tactile stimuli) when I say it, then through this multi-sensory approach you will acquire the ability to say "ball". Oral motor therapy (OMT) does not work like that, particularly with our special education clients who have reduced visual or auditory capabilities. OMT asserts that the translation of this tactile information has to take place in the mouth; that therapists must put something into their client's mouths that is going to increase their client's awareness of their mouth and that will, in a series of measured progressions, strengthen the target muscle groups. This oral muscular development and control is an important prerequisite which then enables the clinician to use traditional articulation therapy. At the therapeutic level straws have the promise of addressing a multiple array of disorders and muscle groups far beyond traditional practice. Let's review some basics. In English, in order to have connected speech (co-articulation) and speech clarity we have to stabilize the back of our tongue on the back of the palate. Then, whatever else our tongue is required to do, it moves from that position of stability. The tongue elements work with four basic movement components:
  • retraction/protrusion
  • back elevation/depression
  • tip elevation/depression and
  • the ability to spread the sides of the tongue.
When babies are born they have approximately a 50% back and 50% forward movement from the resting position called a suckle. As the child gets older and begins spoon and cup-feeding they achieve about a 75% retraction and 25% protrusion. They do not stick their tongues out during feeding. Those who do frequently present with feeding problems. Straws have been prescribed routinely for these occurrences because, at the very least, through straw feeding, the client can return to the 50%/50% suckle. But there is no reason to stop there, and, I would argue that allowing clients to suckle straws is therapeutically wrong IF treatment stops there. Suckling can actually exacerbate protrusion of the tongue. (It should be mentioned that sippy-cups, a popular feeding tool, encourage suckling, once again falling short of the preferred 75%/25% retraction/protrusion goal.)
By continuing to use a progressive series of increasingly more complex straws and thicker liquids we can teach the tongue muscle to retract. The goal is to achieve close to a 75% retraction; to achieve that position of stability. The back of the tongue in stabilized retraction allows the tip of the tongue to move side-to-side to alternating back molars; the very movement that is needed to chew food effectively. At this milestone we have clients who attain more eating independence and improved nutrition, both very important for children that have not progressed well with cups or spoons.
How do therapeutic straws address speech clarity goals? Children or adults with interdental lisps are missing this important component of stabilized tongue retraction. Clients who stabilize their tongue at the front of their mouth between their teeth, rather than in the retracted position of stability, are said to be fronting their sounds. If a client is using an interdental production on /t/, /d/ or /n/, which are the first stable retracted sounds in the developmental scale, the mastery of these sounds must occur before attempting to master /s/ or /z/. If a developmentally normal three-year-old interdentalizes on /n/ there is already a problem. In fact, any three-year-old with an interdental production on /t/, /d/ or /n/ needs help to retract the tongue, and further, any child with an identified speech problem who suckles, whether its a bottle, cup or straw, is maintaining their speech errors if they are secondary to interdental tongue placement. (If a developmentally normal four-year-old does not interdentalize on /t/, /d/ or /n/, has correct tongue blade retraction, but lisps on /s/ it is possible that the lisp is secondary to a developmental delay and may not need therapeutic intervention.)
How do we get clients on therapeutic straws and at what age or point in therapy? Muscles can be toned at any age; one or one hundred. These techniques will work anytime but the younger the client the easier.
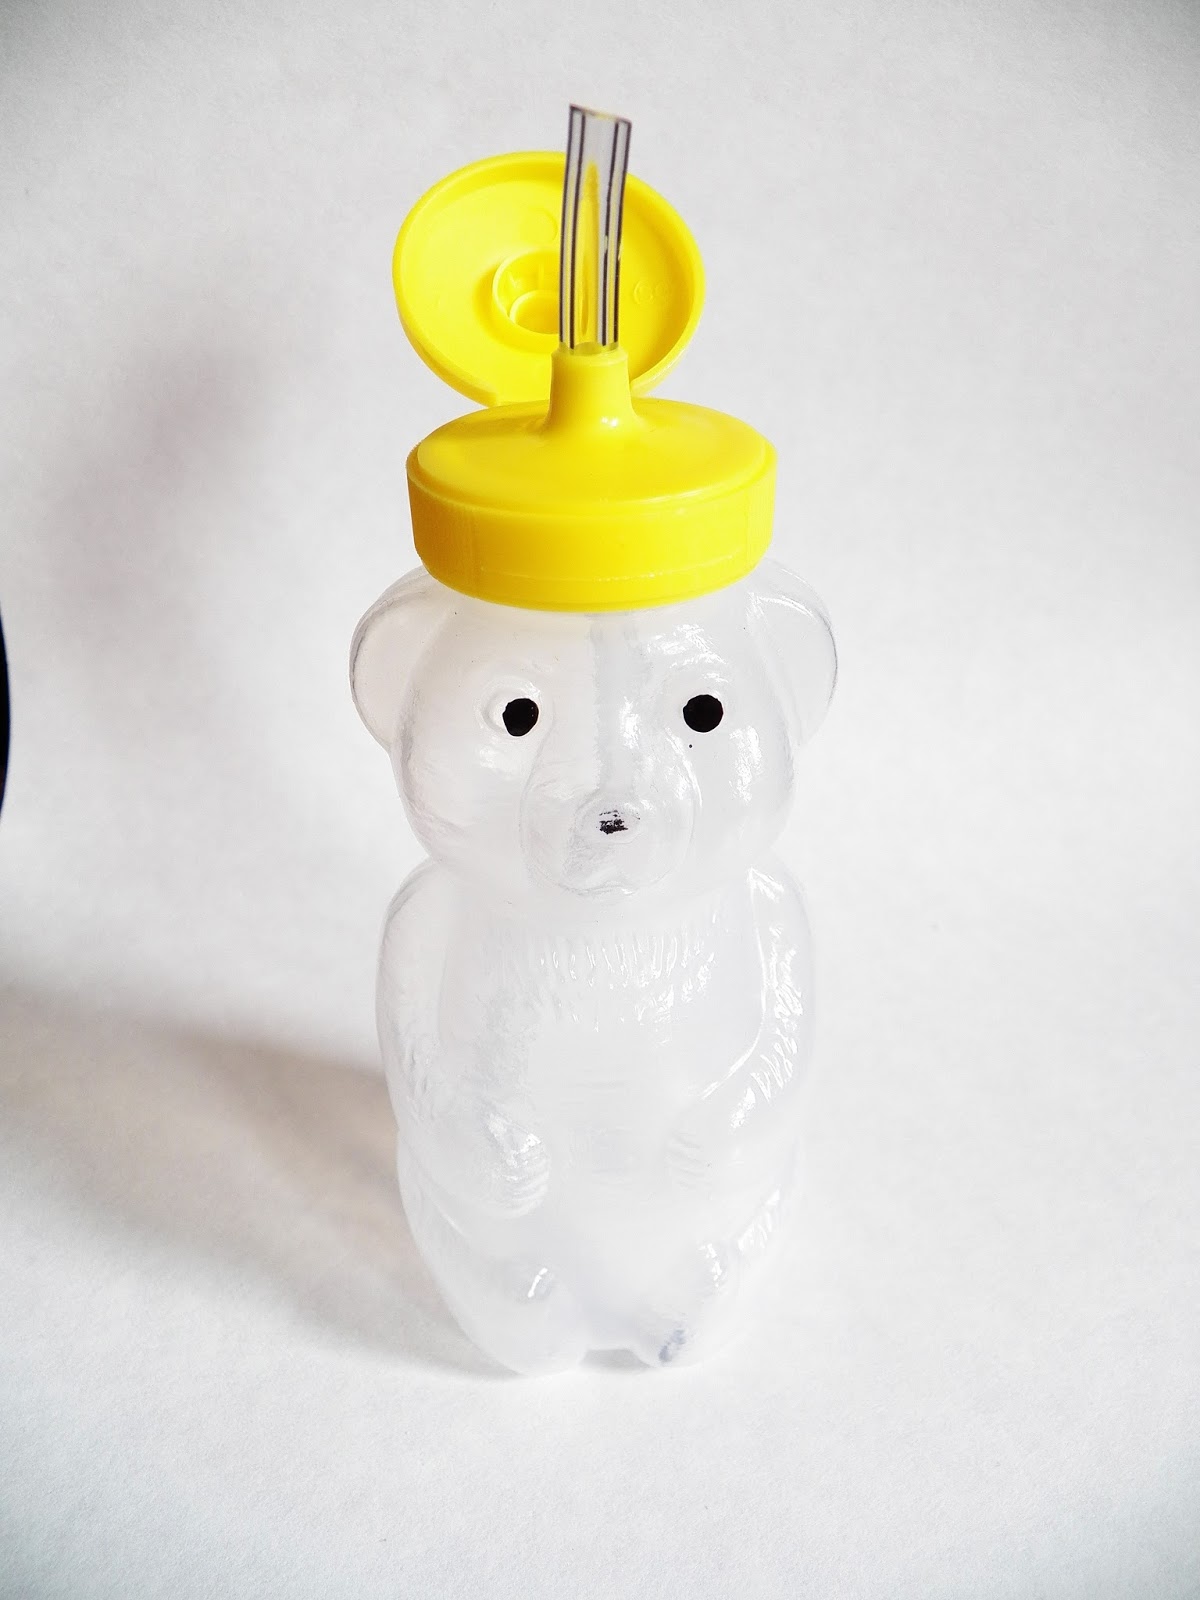
Young children with an identified dysfunction can often be started as early as one-year-old. Many of our clients with Down Syndrome are started this early because we are working on the concept of retraction as a critical oral motor skill that then cascades into other oral motor benefits. Other clients with a low tone diagnosis also benefit from this early intervention. Many of these children are still on a bottle at ages two, three or four; suckling. In virtually all cases, by the age of two, straw therapy can be successfully undertaken. Some children need an assisted transition. I use a squeezable "honey bear", emptied, cleaned, filled with slightly thickened liquid and retrofitted with a straw. The child can still clutch the "honey bear" bottle while learning to draw liquid up through the straw. The care-givers for low-tone children who may not be able to pull liquids up on their own initially can gently squeeze the liquid up to assist.
Exactly what is straw drinking? Normal straw drinking requires complex movement from the jaw, lips and tongue. Through the coordination of these movements a vacuum draw is created. Each of our speech sounds are made with a different combination of these graded movements.
Over many years I developed a successional group of straws with each individual straw working on a specific part of those graded movements. After initial experiments with ordinary straws, which offer such limited results as to be therapeutically unusable, I located every conceivable type of straw produced and jury-rigged them when necessary. Ultimately I was compelled to persuade straw manufacturers to custom-produce a few of the straws for the specific attributes that I needed.
This hierarchy of straws progresses through a matrix that advances from multiple sips to single sips and then from thin liquids to thickened liquids while varying the straw's diameter, overall length and the structural complexity via elbows, curves, twists and placement of a lip block.
How would therapy begin? At the outset - making sure that the client is sitting up straight in a stable position receptive to drinking - I give them a simple, straight, regular-diameter straw to see how they will use it, allowing them to drink from it like they normally would. I place my finger at the point where the straw is entering the mouth so that I can then take the straw out and measure the length from the entry point to the tip of the straw that is inside the mouth. There are several things to watch for at this stage. Is the straw more than 1/4 - 1/2 of an inch inside their mouth? If so, then they are either suckling it or biting it. Is the client biting the straw? If so, that could be an indication of jaw instability. The correct position for the therapeutic use of the straw is with jaw stability, tongue retraction and lip rounding to fully enable drawing.
The first straw in my hierarchy is cut to the length that I measured above. The straw has a lip block which encourages sealing and rounding. Over a succession of visits as the client exhibits proficiency I surreptitiously reduce the length from the lip block to the internal tip until the client has achieved primary retraction and at least minimal lip rounding. At this point the client is said to be therapeutically drinking from a straw and I am free to move through the remainder of my hierarchy. Clients are taking these straws home and using them daily for drinking all thin liquids. As they progress, thickened liquids and purees are introduced using specifically identified straws in the hierarchy. The clients use these straws to drink 3-4 ounces once a day. As each straw is mastered or seems to be too easy, I move onto the next. For some clients this may be as frequently as one new a straw a week, as it might be in the case of a developmentally normal child with an interdental lisp. For this client a full, successful course of treatment may last as short as four months.
Other clients, depending on the diagnosis, for example cerebral palsy, the therapy, while still effective, may continue for a longer period of time. A client with Down Syndrome may complete the full treatment in one to two years and we often find that this t ype of therapy reduces the duration of speech therapy as they get older. Clinicians who are targeting specific sounds in therapies with their clients will find that therapeutic straw treatments have proven to be effective with the standard production of /t, d, l, n, k, g, s, z, ch, sh, j, & r/.
Clients with velo-pharyngeal insufficiency are another population that benefit from straw drinking. For them it increases tongue retraction, changes resonation and elevation of the velum. Clients recovering from Cerebral Vascular Accidents (CVA) often exhibit lip asymmetry. Therapeutic straw drinking works to bring their lips to symmetrical midline thereby improving speech clarity.
An extra advantage of treatment through therapeutic straw drinking is that it can be equally effective with clients irrespective of cognitive abilities. That is the therapeutic results, (tongue retraction and tongue grading), for a client with severe cognitive impairment and limited or no language skills can be almost the same as with a developmentally normal child or adult. This adds to its promise as an important tool in the arsenal of all oral motor and speech pathologists.” http://speech-language-pathology-audiology.advanceweb.com/Article/Part-I-Straws-Using-Simple-Tools-in-Oral-Motor-Therapy.aspx
I personally attended the courses presented by the master, Sara Rosenfeld-Johnson and truly recommend to have a look, get familiar or buy a set for yourself to try http://www.talktools.com/straw-kit/

Monday, June 11, 2012

Sensory and Feeding Products

I use in therapeutic treatment and feeding
Get familiar and decide yourself what is the best for your child/patient.
Let me know if you found the list useful by sharing your opinion in a "Post a Comment" section at the end of the page. Thank you - Urszula

Sensory Treatment:

Infant Toothbrush
Toddler Toothbrush
Nuk Toothbrush
Nuk Massager
Vibrator and Toothattes
Jiggle Vibrators
ARK Grabbers
ARK Animal Menagerie
ARK Tri Chew
ARK Z-Vib Set
Chewy Tubes
Flavored Wooden Tongue Depressors
Tick-Tong Flavored Plastic Tongue Depressor
Roller Ice
First Year Massaging Action Teether

Feeding:
Feeding Syringe
Maroon Spoon
Duo Spoon
Textured Spoon Set
Soft EZ Spoon
Infa Trainer Cup
Recessed-Lid Drinking Cup
Cut-Out Cup
Honey Bear with Straw
Stores/webs where I buy /order them

  1. Talk Tools www.talktools.com  
Look under Feeding Tools http://www.talktools.com/feeding-tools/
Look under Sensory Tools http://www.talktools.com/sensory-tools/

  1. Equipment Shop www.equipmentshop.com.